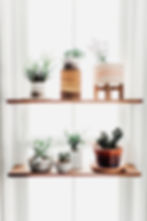
Hi, friends - if you caught my kitchen tour post a few weeks back, you may recall that I shared a photo of a shelf we made ourselves that hangs in our kitchen window. Today I am excited to share all the DIY details of this shelf with you!

I love this shelf for a few reasons. First, it's a creative use of space. When we were remodeling our kitchen, we wanted to maximize every inch of work space, but also wanted allll the plants in our kitchen. By making and hanging this shelf in our window, we gained 2 sizable shelves that hold multiple plants - using what would otherwise have been unused space, and without taking up any floor space. Second - I love that the shelf gives us a little bit of privacy in the window, but also allows a ton of natural light to flow into the kitchen. And third - I love this project because you can customize the shelf to meet your needs. We have 2 shelves to allow us to fit tall plants on both, but you can easily make this with 3 shelves if that fits your needs better. You can also adjust the shelf heights based on whatever works best for you.
Okay, now onto the details!

To make this, you will need:
Supplies:
1x8 pine board (we purchased a 6' long board, you may need longer depending on the width and number of shelves)
Stain (or paint if you prefer)
20 feet of galvanized steel cable (we used 3/32" cable but you can use any size you like, just be sure the cable, kit, and swaging tool are all the same size)
4 ferrule and stop kits (the kit we purchased came with 2 ferrules and 2 stops, you will need 4 stops per shelf, and 4 ferrules total)
Tools:
Tape measure
Saw
Sander/sand paper
Electric drill fit with 3/16" bit
Marker
Level
Heavy duty side cutters
Helper/second set of hands
Step stool (if your window is tall and you are short, like me!)
Start by measuring the inside width of your window - casing to casing. This is the length you will cut your shelves. We cut ours 29" long. Cut your board into your shelves, and sand them until you eliminate any rough spots/edges. Once sanding is complete, stain or paint the wood. We used gel stain because I find it easy to work with, but use whatever you have, and follow the instructions on the can. Be sure to stain all sides of each shelf, since you will see the underside and ends of each shelf once hanging.

Once your stain or paint is dry, grab your drill. You will drill 4 holes into each board - drill one hole in each corner, about 1" in from each side (as shown above). We used a 3/16" drill bit, to ensure our 3/32" cable would fit through each hole.

Next, determine the height where you want the bottom shelf to be (from the top of the window). Take that length, and add an extra foot to it. You need that extra length on each cable for hanging, and you will have some excess to cut off. Our bottom shelf hangs at roughly 45" below the screw hook and ring, but you can hang yours at whatever height you want/whatever looks right. So, to hang ours at 45", we measured and cut 4 pieces of cable at 57" using the side cutters.
Next, you will add one stop to the bottom of each cable. Take a look at the kits you bought - the ferrules hold 2 cables together, while the stops fit on just 1 cable.

For this step, you want the stops, since your shelves will rest on those. Thread each stop on like a bead, position it at the very end of the cable, and crimp using the swaging tool. Quick note on the swaging tool - these tools are around $30. I suggest asking around to see if you can borrow this tool from a friend or family member before starting this project, especially if you don't see yourself using the tool after this project. The tool works with more than one size stops/ferrules. Once you have your stop or ferrule in place, you find the hole on the end of the tool that fits your size, and squeeze the handles (at the other end) of the tool together to squeeze/crimp the hardware in place.
Note that the stop is at the bottom of the cable - meaning the cable does not stick out the bottom of the stop (see below). Add the other 3 stops the same way. Once all 4 stops are in place, thread the bottom shelf onto the cables.

Next, determine the height where you want the bottom of your next shelf to be. Our shelves are 15" apart. This height leaves us room for some taller plants.

With your tape measure, measure 15" up from your bottom shelf, and mark a dot with your marker on each of the 4 cables. Now, this next part requires a little patience because you need your shelves to be level! Thread your second second of stops on, and crimp in place where you made the mark with your marker. Be patient and get them right on the dot you made - they are a little squirmy when you start crimping, but a helper can help you hold everything in place to ensure your stops are in the right spot. Once all 4 stops are in place, thread your top shelf onto the cables.
With your hands, screw your eye hooks into the top of your window casing. In terms of placement, we put our eye hooks into the casing 2.5" inches out from the window. We chose this depth based on our window casing and how far we wanted the shelves to stick out. You want to sort of tuck the shelves into the window so the casing and shelves are just touching. This allows the casing to provide your shelf with a little support.
You will need your helper for this next step. Once your eye hooks are in place, put a round ring on each hook. Grab your level and set it on your bottom shelf. Now you will take each of your 4 cables and attach each to your round rings with the ferrules. Take a look at this close-up first to see how you will put everything together.

Start with your front right cable, loop it through the right ring and back down, and set the ferrule about 3" down from the ring. With the ferrule, you are attaching the end of the cable to itself. Next, grab your front left cable and loop that through the ring. Have your helper hold the cable in place where you will set the ferrule it, at 3" down from the ring. While your helper is holding this in place, check your level. Make sure both shelves are level left to right, and then set the ferrule on the front left cable. Take your time to make sure things are level before setting the ferrule at each step. Once you set the ferrule, there is no going back!
Now, grab your right back cable and flip your level front to back on one of your shelves. Repeat the process with the right back cable, and check that both shelves are level front to back before setting the ferrule. Grab your remaining cable (left back) and loop that through the left ring. Have your helper hold the left back cable in place while you give everything one final check - with the level and with your eye to make sure things are looking okay. Once you are sure the shelves are level, set your final ferrule in place. Use your side cutters to cut off any excess cable below the 4 ferrules if needed.
You may have noticed by now that your shelf is hanging, and you are done! This is one of the more involved DIY projects I have posted so far. Please let me know if you have any questions, and I would be happy to help! I hope you will give this project a try - the final product is truly worth it!

We really enjoy this shelf - and hope to make another one soon!


For more DIY inspiration, follow me on Pinterest!
Photos of completed shelf by Kimberly Schuldt Photography.
